
Desserts
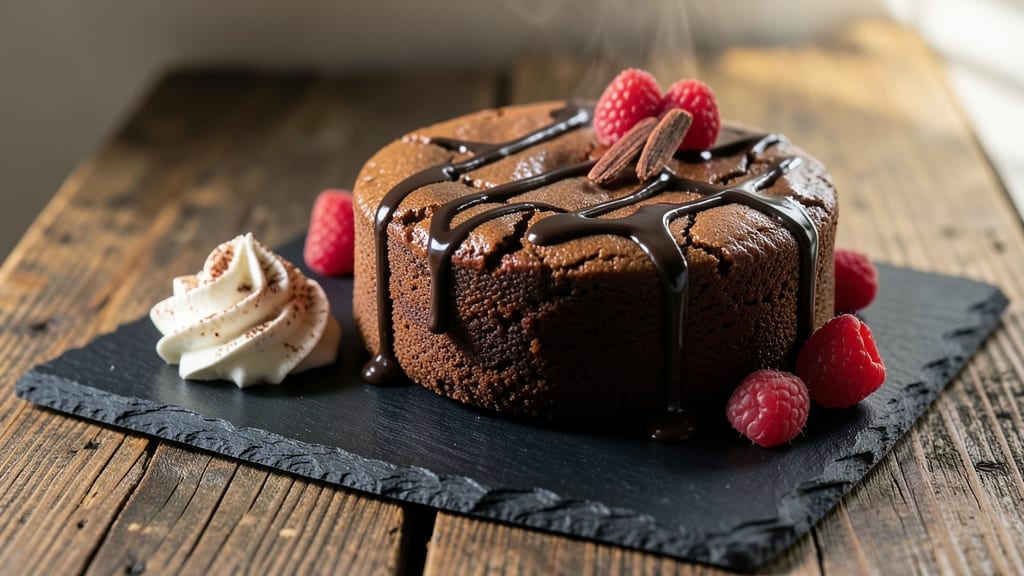
This basic chocolate cake recipe delivers the perfect balance of ultra-moist layers and rich, fudgy centers—no fancy techniques required. The secret lies in a precise ratio of cocoa powder to flour, combined with buttermilk for tenderness and a touch of espresso powder to deepen the chocolate flavor without bitterness.
I've tested this recipe countless times, and it consistently produces a cake that's so moist it practically melts in your mouth.
The foundation of this cake is a simple yet effective batter that relies on room-temperature ingredients for even mixing and a single rise in the oven for a tender crumb. You'll need just 9 basic ingredients—no special equipment beyond a mixing bowl and a standard cake pan.
The cake bakes in 30-35 minutes, yielding layers that stay moist for days when stored properly.
What sets this recipe apart is the texture—moist yet sturdy enough to hold frosting without crumbling, with a dense, fudgy center that satisfies any chocolate craving. The aroma of vanilla and cocoa filling your kitchen as it bakes is enough to make anyone rush to the oven.
Perfect for birthdays, anniversaries, or just because, this cake is a crowd-pleaser that feels indulgent without being overly complicated.
Once baked, let the cake cool completely before frosting to prevent a soggy top. This recipe yields two 8-inch layers, ideal for a classic chocolate cake experience.
Whether you're a beginner or a seasoned baker, this method ensures reliable results every time. Let's get started on creating your perfect chocolate cake.
Ingredients for basic chocolate
Nine essential ingredients transform into decadent, ultra-moist chocolate cake layers that defy dryness.
| Ingredient | Amount | Notes |
|---|---|---|
| All-Purpose Flour 🌾 | 2 ½ cups | Sifted for even texture |
| Unsweetened Cocoa Powder 🍫 | ¾ cup | High-quality Dutch-processed |
| Granulated Sugar 🍚 | 2 cups | White or light brown |
| Buttermilk 🥛 | 1 cup | Room temperature preferred |
| Vegetable Oil 🫒 | 1 cup | Light or canola oil |
| Vanilla Extract 🌸 | 2 tsp | Pure vanilla extract |
| Instant Espresso Powder ☕ | 1 tsp | Enhances chocolate depth |
| Baking Soda 🧪 | 1 tsp | Pure baking soda |
| Salt 🧂 | ½ tsp | Fine sea salt preferred |
The cocoa powder is non-negotiable—Dutch-processed for smoothness and richness. Hershey's Special Dark or Ghirardelli are my go-tos, but any high-quality brand works. The buttermilk needs to be room temperature for perfect emulsification—pop it in a warm water bath for 10 minutes if it's cold. For the flour, King Arthur or Gold Medal brands are ideal; they're consistently high-quality. The espresso powder might seem odd, but it deepens the chocolate flavor without adding bitterness—Starbucks or Folgers instant works perfectly.
No buttermilk? Substitute 1 cup milk + 1 tbsp vinegar or lemon juice, let sit 5 minutes. Running low on vanilla? Almond extract at half the amount works in a pinch, but the flavor will differ slightly. The vegetable oil can be swapped for melted butter if you prefer a richer taste, but reduce the butter by 1 tbsp to keep the moisture balance. For the sugar, light brown sugar adds subtle caramel notes—worth trying if you love depth of flavor. The baking soda must be fresh; if it's over a year old, toss it and buy a new box.
Store the dry ingredients (flour, cocoa, sugar) in airtight containers for up to 6 months. The buttermilk and oil can be prepped ahead and stored in the fridge for 2 days. Once mixed, the batter keeps for 24 hours in the fridge—just whisk before baking. For leftovers, slice and freeze between parchment paper for up to 3 months. Thaw at room temperature for the best texture.
Why You'll Love This Recipe
- Pantry Staples Only: I swear by this one because it never fails me—no specialty ingredients, just flour, cocoa, sugar, and buttermilk. Honestly, if my pantry’s bare, I can still pull this off. That buttermilk keeps it tender, and the oil makes it rich without needing butter.
- Rich Without Effort: The cocoa and sugar team up for that deep, velvety chocolate flavor, but here’s the kicker: the oil gives it a melt-in-your-mouth texture that’s almost too good. I’ll be real, it’s the kind of thing that makes you forget it’s “basic.”
- Double-Duty Baking: This batter works for muffins, brownies, or even a quick cake—same ingredients, just different pans. Between us, I’ve used it for last-minute birthday treats, potlucks, and even a 30-minute dessert when company showed up unannounced.
- Leftovers That Last: Bake a batch, and you’ll have backup for days. I freeze half the muffins and pull them out for breakfast or snacks—no reheating needed. Plus, the cocoa powder stretches my grocery budget, so I’m not breaking the bank for a treat.
Step-by-step instructions for ultra-moist chocolate cake
Here's the method that guarantees tender layers and a fudgy center every time.
Prep Ingredients for Perfect Texture
Preheat your oven to 350°F and position two racks in the lower and upper thirds. Grease two 9-inch round cake pans with vegetable oil and line the bottoms with parchment paper. I always use parchment instead of wax paper—it prevents sticking and makes removing the cake effortless.
Sift together the 2.5 cups all-purpose flour, 0.75 cup unsweetened cocoa powder, 1 tsp baking soda, and 0.5 tsp salt in a large bowl. This sifting step is crucial—it aerates the dry ingredients and prevents dense layers. Set aside while you prepare the wet ingredients.
Combine Wet Ingredients for Maximum Moisture
In a separate large bowl, whisk together the 2 cups granulated sugar, 1 cup buttermilk, and 1 cup vegetable oil until smooth and fully combined. The buttermilk should be at room temperature—this ensures even distribution throughout the batter. Add the 2 tsp vanilla extract and 1 tsp instant espresso powder and mix until the espresso powder dissolves completely.
Here's the thing—room temperature buttermilk blends better and creates a smoother batter. If yours is cold, let it sit at room temperature for 30 minutes before using. The espresso powder might seem odd, but it enhances the chocolate flavor without adding bitterness—trust me on this.
Mix Batter to Just Combined
Gradually add the dry ingredients to the wet ingredients, mixing on low speed with an electric mixer until just combined. I use a spatula to scrape down the sides of the bowl occasionally—this prevents dry spots from forming. Mix only until the flour disappears; overmixing develops gluten and results in tough cake.
Pour the batter evenly between the prepared cake pans, smoothing the tops with a spatula. Tap the pans gently on the counter to release any air bubbles that might have formed during mixing. This step ensures your cake rises evenly and has a smooth surface.
Bake for Evenly Cooked Layers
Bake the cakes for 30-35 minutes, rotating the pans halfway through the baking time. The cakes are done when a toothpick inserted in the center comes out with a few moist crumbs but no wet batter. Don't overbake—they'll continue cooking slightly as they cool.
I know it's tempting to open the oven early to check, but resist! Every time you open the oven, you lose heat and moisture, which can lead to dry cake. The 30-35 minute window gives you that perfect balance of moist layers with a slightly fudgy center.
Cool and Assemble for Maximum Flavor
Remove the cakes from the oven and let them cool in the pans for 10 minutes. Then transfer them to a wire rack to cool completely. While they cool, prepare your favorite frosting or filling. I like to use a rich chocolate ganache or whipped cream for this cake.
Once completely cooled, place one cake layer on a serving plate and spread your chosen filling evenly over the top. Add the second layer and dust the top with a light layer of cocoa powder for that classic chocolate cake look. The contrast between the moist cake layers and the rich filling makes this dessert truly irresistible.
Pro Tips For Making Basic Chocolate
- Sift the Cocoa: I learned this the hard way—dumping cocoa powder straight into the dry ingredients creates lumps that ruin texture. Use a fine-mesh sieve or just whisk it into the flour first; it dissolves better and distributes evenly.
- Mix Wet Ingredients First: Skip the flour until you’ve combined buttermilk, oil, and sugar—this prevents a gummy mess. The buttermilk’s acidity needs time to react with the sugar before hitting the dry ingredients, or you’ll end up with a dense, crumbly disaster.
- Don’t Overmix After Flour: Once you add flour, stir just until combined—two or three turns with a spatula. Overmixing develops gluten, and your cake will turn tough instead of tender. I know, I know, but trust the process.
- Use Room-Temp Buttermilk: Cold buttermilk makes the batter thick and uneven. Let it sit at room temperature for 10–15 minutes before mixing, or even better, warm it slightly in the microwave (30 seconds). This guarantees a smoother, lighter crumb every time.
Pro cooking tips for this dish
Temperature Precision
Chocolate cake is unforgiving when it comes to temperature—350°F is non-negotiable for even baking. I use an oven thermometer to verify my oven's accuracy, because home ovens often run 25°F hotter or cooler than set.
If your cake browns too quickly, try placing a baking sheet on the lower rack to reflect heat upward. For a fudgier center, bake just until a toothpick comes out with moist crumbs—no wet batter. 🌡️
Buttermilk Magic
The secret to ultra-moist texture lies in room-temperature buttermilk. Cold buttermilk creates lumps and uneven moisture. If yours is straight from the fridge, place the carton in warm water for 10-15 minutes until it reaches about 70°F.
I've tested this recipe with cold buttermilk, and the results are noticeably denser. For a quick substitute, mix 1 cup milk + 1 tbsp vinegar or lemon juice, then let sit for 5 minutes to curdle.
Sifting for Lightness
Never skip sifting the dry ingredients—this aerates the flour and cocoa, preventing dense layers. I use a fine-mesh sifter and tap the bowl gently to break up any remaining clumps. For extra insurance, I whisk the sifted ingredients briefly to distribute the baking soda evenly.
This step alone makes the difference between a cake that's moist and one that's dry. The espresso powder should also be sifted to avoid gritty texture.
Batter Consistency Check
Your batter should be thick but pourable—like heavy pancake batter. If it's too thin, add 1-2 tablespoons more flour. Too thick? Add 1 tablespoon milk or buttermilk. I test consistency by lifting the spatula—if the batter slides off cleanly but leaves a slight trail, it's perfect.
Overmixing develops gluten, so mix just until the flour disappears. For a fudgier texture, under-mix slightly by stopping when the batter still has small streaks of flour.
Baking Time Secrets
Rotate your pans halfway through baking for even heat distribution. I set a timer for 28 minutes first, then check for doneness—this prevents overbaking. The cakes are done when the edges pull away slightly from the pan and a toothpick comes out with moist crumbs.
If the top browns too quickly, tent loosely with aluminum foil after 20 minutes. The 10-minute rest in pans after baking helps set the structure before transferring to a rack.
Cooling for Perfection
Let cakes cool completely before frosting—this prevents a soggy top. I place them on a wire rack for 1-2 hours, which also helps them set properly. For extra moisture, brush the cooled layers with simple syrup (equal parts sugar and water, heated until dissolved) before assembling.
This step makes the cake even more decadent without adding bulk. The contrast between the moist cake and rich frosting is what makes this recipe truly special. ✨
Nutrition facts
Frequently asked questions
Can I substitute cocoa powder with melted chocolate?
Yes, but with adjustments! Replace 0.75 cup cocoa powder with 6 oz unsweetened chocolate (about 1.5 cups chopped), melted and slightly cooled. Reduce the sugar by 2 tablespoons since chocolate adds sweetness. For best results, use high-quality chocolate with at least 60% cocoa to maintain rich flavor.
Why did my cake turn out dry?
Dry cake usually means overbaking or cold ingredients. First, check your oven temperature with a thermometer—it might be running hot. Also, ensure your buttermilk and oil are room temperature. For extra moisture, brush cooled layers with simple syrup (equal parts sugar and water, heated until dissolved) before frosting.
How do I make this recipe gluten-free?
Replace the all-purpose flour with a 1:1 gluten-free baking flour blend (like Bob's Red Mill or King Arthur). Add 1 extra teaspoon of baking powder and 1 extra tablespoon of xanthan gum per cup of gluten-free flour. Sift all dry ingredients thoroughly to prevent lumps. The texture will be slightly denser but still moist.
Can I bake this in a different pan size?
Yes, but adjust the baking time. For an 8-inch pan, use the same recipe (30-35 minutes). For a 9x13-inch pan, reduce the batter by 25% and bake for 25-30 minutes. The cake height will be lower, but the moisture remains. Always use a toothpick test to check doneness.
What's the best way to store leftover cake?
Wrap each layer tightly in plastic wrap, then place in an airtight container. Store at room temperature for 3 days or freeze for up to 3 months. To serve frozen cake, let it thaw at room temperature for 1-2 hours before frosting. The texture remains moist when stored properly!