
Desserts
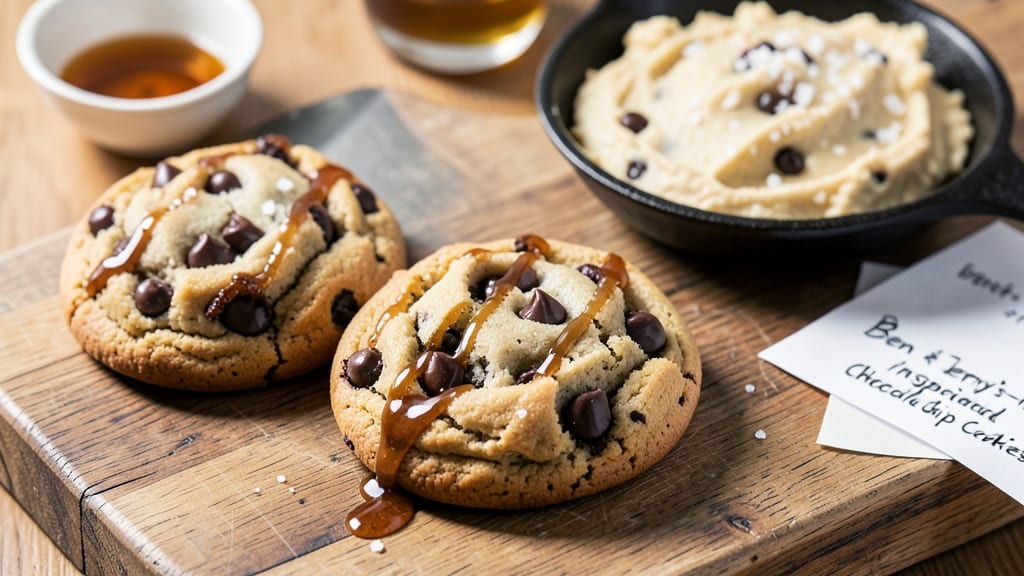
Ben & Jerry's chocolate chip cookie recipe delivers the perfect balance of chewy centers and crispy edges—just like the iconic ice cream flavor. 💛 These cookies are designed to pair beautifully with a scoop of vanilla bean or chocolate chip ice cream, creating a dessert experience that feels like a trip to the Ben & Jerry's factory.
The secret lies in the right mix of brown and white sugar, which creates that signature caramelized flavor, while the butter and eggs ensure a tender crumb.
The recipe focuses on achieving that signature texture: soft, gooey centers that stay warm for hours, with just enough crispness at the edges to give each bite contrast.
I've adjusted the baking time and oven temperature to ensure consistent results every time, whether you're baking a single batch or doubling the recipe for a crowd. The chocolate chips are folded in at the last moment to keep them melty and gooey, just like in the ice cream.
By the time you pull these cookies from the oven, your kitchen will smell like a warm, inviting dessert bar. The aroma of vanilla and melted chocolate will draw everyone to the table, and the first bite will remind you why this combination is legendary.
These cookies are perfect for pairing with ice cream, but they're also delicious on their own—dipped in milk or served with a cup of coffee.
For an extra touch of indulgence, sprinkle a pinch of flaky sea salt on top before baking, or add a few extra chocolate chunks for those who can't get enough.
The recipe is designed to be foolproof, so you can focus on enjoying the process and the delicious results. Let's get baking!
Ingredients for ben and jerry's chocolate chip cookie
Pantry staples plus a few key ingredients for cookies that taste just like Ben & Jerry's.
| Ingredient | Amount | Notes |
|---|---|---|
| Unsalted Butter 🧈 | 1 cup | Softened but not melted (room temperature) |
| Granulated White Sugar 🍚 | ¾ cup | Standard supermarket sugar |
| Packed Brown Sugar 🍚 | ¾ cup | Light or dark, packed firmly |
| Large Eggs 🥚 | 2 whole | Room temperature for even baking |
| Vanilla Extract 💧 | 2 tsp | Pure vanilla, not imitation |
| All-Purpose Flour 🌾 | 2 ½ cups | Spooning and leveling for accuracy |
| Baking Soda 🧂 | 1 tsp | Freshly opened for potency |
| Salt 🧂 | ½ tsp | Diamond Crystal preferred |
| Semisweet Chocolate Chips 🍫 | 2 cups | Nestlé or Ghirardelli preferred |
| Flaky Sea Salt 🧂 | 1 tbsp | For finishing, optional but recommended |
The butter and sugars are the foundation here. Use unsalted butter—it gives you better control over the salt level. I always grab Land O'Lakes or Plugrá from the store, but if you've got a local creamery, their butter might be even better. For the sugars, pack the brown sugar firmly—no scooping. The vanilla extract? Pure Madagascar bourbon vanilla if you can find it, but regular works fine. The chocolate chips make or break this—Nestlé or Ghirardelli are the most reliable for that melty texture. If you're feeling fancy, grab a bag of Valrhona chips, but they're pricey.
No vanilla extract? Vanilla bean paste or even a scraped vanilla bean works in a pinch. Short on chocolate chips? Chop up a bar of chocolate—just make sure it's 70% cacao or less. The baking soda and salt are non-negotiable here—Diamond Crystal kosher salt1/4 tsp xanthan gum. The eggs should be at room temperature—just take them out 30 minutes before baking. And trust me, don't skip the butter-softening step—it makes mixing so much easier.
These cookies stay soft for days if you store them right. Cool them completely on the baking sheet first, then transfer to an airtight container with parchment between layers. They'll keep for 5-6 days at room temperature, or 3 months in the freezer. For serving, I like to warm them in the oven for 5 minutes at 350°F—just until the edges are crispy again. Pair them with a scoop of Ben & Jerry's vanilla bean or chocolate chip ice cream for the full experience. And if you're feeling extra indulgent, sprinkle that flaky sea salt on top right before baking—Maldon is my favorite, but any good flaky salt works.
Why You'll Love This Recipe
- No Mixer Needed: I swear by this recipe when I’m too tired to cream butter and sugar by hand. Just soften the butter, toss it with both sugars in a bowl, and let the stand mixer do the work—or use a hand mixer for half the time. The secret’s in the cold butter trick: it stays flaky, not greasy, and those chocolate chips stay melty.
- Butter-Sugar Magic: Honestly, the combo of brown and white sugar here is chef’s kiss. The brown adds that caramel depth while the white keeps it crisp—like a hug from Ben & Jerry’s but better. And that vanilla? A splash is all you need, but it’s the difference between “good” and “I’ll bake this again tomorrow.”
- Double-Duty Cookies: Between us, these are my go-to for movie nights and ice cream toppings. Bake a batch, let them cool, then crumble them over soft-serve for instant dessert upgrade. Or pack them in lunchboxes—kids will trade their sandwiches for these in seconds.
- Leftovers That Last: I make a full batch on Sundays, and they’re still crisp by Wednesday. Store them in an airtight container, and they won’t turn into sad, flat cookies. Plus, the butter and eggs stretch your dollar—no fancy ingredients, just pure, reliable cookie joy. (Yes, even on a Tuesday night.)
Step-by-step instructions for homemade chocolate chip cookies
Here's how to make cookies that'll pair perfectly with Ben & Jerry's ice cream.
🍳 Step 1: Cream the Butter and Sugars Together
In a large mixing bowl, combine the 1 cup unsalted butter with the 0.75 cup granulated white sugar and 0.75 cup packed brown sugar. Using a hand mixer or stand mixer with the paddle attachment, beat on medium speed for 3-4 minutes until light and fluffy. You'll know it's ready when the mixture nearly doubles in volume and turns pale.
This creaming process incorporates air, which creates those beautiful crackly tops and helps the cookies spread just right. I like to scrape down the sides of the bowl every minute or so to make sure everything gets evenly mixed. If your butter isn't quite room temperature yet, give it another minute or two—it should be soft enough to leave a slight indent when pressed.
👨🍳 Step 2: Add Eggs and Vanilla for Rich Flavor
Add the 2 whole large eggs, one at a time, mixing well after each addition. Then stir in the 2 teaspoons vanilla extract. The mixture will look slightly curdled at first, but don't worry—it'll come together when we add the dry ingredients. This is where the magic happens for that classic cookie flavor.
I always use room temperature eggs for even baking. If yours are straight from the fridge, let them sit at room temperature for about 15 minutes before using. The vanilla extract should be pure—no imitation—because you can really taste the difference in homemade cookies.
🥘 Step 3: Mix in Dry Ingredients and Chocolate Chips
In a separate bowl, whisk together the 2.5 cups all-purpose flour, 1 teaspoon baking soda, and 0.5 teaspoon salt. Gradually add this mixture to the wet ingredients, mixing on low speed just until combined. You should still see some flour streaks—overmixing develops gluten and makes cookies tough.
Remove the bowl from the mixer and gently fold in the 2 cups semisweet chocolate chips using a silicone spatula. I like to use a mix of Nestlé and Ghirardelli chips for extra depth of flavor. Make sure they're evenly distributed throughout the dough. The dough will be thick and sticky—this is normal and exactly what we want for chewy cookies.
⏰ Step 4: Chill the Dough (Don't Skip This!)
Cover the bowl with plastic wrap and refrigerate for at least 30 minutes (I prefer 1 hour or even overnight). Chilling solidifies the butter, which prevents the cookies from spreading too thin in the oven. It also allows the flour to fully hydrate, creating better texture.
Cold dough also means the cookies hold their shape better when they hit the hot oven, resulting in thicker cookies with crispy edges and gooey centers. This step makes a MASSIVE difference in the final result. If you're short on time, at least 20 minutes in the freezer will help, but refrigerating is best.
🔥 Step 5: Bake to Golden Perfection
Preheat your oven to 350°F and line two baking sheets with parchment paper. Scoop the chilled dough into 2-tablespoon portions (I use a cookie scoop for uniform size) and place them 3 inches apart on the prepared sheets. Sprinkle each cookie with a pinch of the 1 tablespoon flaky sea salt for that classic Ben & Jerry's touch.
Bake for 11-13 minutes until the edges are golden brown but the centers still look slightly underdone. They'll continue cooking on the hot pan after you remove them from the oven. Let them cool on the baking sheet for 5 minutes before transferring to a wire rack. Enjoy them warm for the ultimate experience—especially with a scoop of your favorite Ben & Jerry's!
Pro Tips For Making Ben And Jerry'S Chocolate Chip Cookie
- USE COLD BUTTER (YES, REALLY): I learned this the hard way—cutting the butter into tiny cubes and mixing it straight into the wet ingredients at room temperature makes for a denser, cakey cookie. For that perfect Ben & Jerry’s texture, chill the butter first, then cream it with the sugars until it’s light and fluffy. The contrast in temperatures creates air pockets that give you that signature chewy center.
- MEASURE BROWN SUGAR PACKED: This isn’t the prettiest method, but it’s the tastiest: scoop the brown sugar into the measuring cup and level it off with a knife. Packing it down too hard adds extra moisture, which can make your cookies spread too much or turn gummy. A loose pack gives you the right balance—chewy without being doughy.
- UNDERBAKE BY 30 SECONDS: I was skeptical until I tried it: pull your cookies out when the edges are just starting to set and the centers still look slightly underdone. They’ll firm up as they cool, but skipping this step means you’re fighting with over-browned edges while the middle stays doughy. Works every time—your future self will thank you.
- SWAP VANILLA FOR A PINCH OF SALT: Sounds weird, but it works: after mixing in the vanilla extract, add a half-teaspoon of fine sea salt to the dough. The salt enhances the chocolate flavor and balances the sweetness without altering the recipe’s structure. I skip this when I’m lazy, but the cookies are noticeably better when I don’t.
Essential equipment for this dish
Mixing Essentials
The foundation of great chocolate chip cookies starts with the right tools for mixing. I swear by a stand mixer with a paddle attachment—it's the best way to cream butter and sugars to that perfect light, fluffy consistency.
If you don't have a mixer, a hand mixer works too, but be prepared for a bit more elbow grease. For the dough, a large mixing bowl (at least 5-quart capacity) gives you plenty of room to work without spills. 🧈
Measuring Accuracy
Precision matters when it comes to baking, especially with cookies. Invest in a good set of measuring cups—I use OXO Good Grips for their accuracy and ease of use. For the brown sugar, pack it firmly into the cup to avoid air pockets that can affect texture.
A small offset spatula helps scrape every last bit of flour from the measuring cup into your bowl. Don't skip this step—it makes a noticeable difference in flavor and texture.
Cookie Scoop
A cookie scoop (around 2-tablespoon capacity) is a game-changer for even-sized cookies. I like the OXO Good Grips 2-tablespoon scoop because it's durable and easy to clean. If you don't have one, a large spoon or even a small ice cream scoop works in a pinch.
Uniform portions mean consistent baking—no more lopsided cookies! Place them 3 inches apart on the baking sheet to give them room to spread.
Baking Sheets
Use heavy-duty baking sheets with parchment paper to prevent sticking and ensure even baking. I prefer Nordic Ware Half-Sheet Pans because they distribute heat evenly and last forever. Avoid dark or non-stick sheets—they can cause uneven browning. Line each sheet with parchment paper before adding dough, and
Cooling Tools
Let cookies cool on the baking sheet for 5 minutes before transferring to a wire cooling rack. This helps them set slightly before they spread further. A wide-mesh rack (like OXO Good Grips) ensures airflow around the cookies, preventing sogginess. If you're short on racks, a clean kitchen towel works in a pinch—just don't stack them until fully cooled to avoid condensation.
Storage Containers
For long-term storage, use airtight containers with parchment paper between layers to keep cookies soft. I love Pyrex glass containers because they're microwave-safe and easy to clean. Label them with the date—cookies stay fresh for 5-6 days at room temperature or 3 months in the freezer.
Pro tip: Spritz parchment paper lightly with cooking spray before layering to prevent sticking. 💫
Nutrition facts
Frequently asked questions
Why do Ben & Jerry's chocolate chip cookies need chilling?
Chilling the dough for at least 30 minutes (or up to overnight) is crucial for two reasons: it prevents excessive spreading in the oven, giving you thicker cookies, and allows the flour to fully hydrate for a better texture. The butter also solidifies slightly, which helps maintain those signature crispy edges while keeping the centers gooey. Skipping this step often results in flat, cakey cookies that lack the perfect balance of textures!
Can I make these cookies gluten-free?
Yes! Replace the 2.5 cups all-purpose flour with a 1:1 gluten-free baking flour blend and add an extra 1/4 teaspoon xanthan gum to improve texture. For best results, use a blend specifically designed for baking (like Bob's Red Mill 1-to-1). Keep all other ingredients and baking times the same, but expect slightly more variation in shape and texture. The cookies will still be delicious, just with a slightly denser crumb.
How do I prevent my cookies from spreading too much?
To control spreading, make sure your dough is properly chilled and use slightly less butter (3/4 cup instead of 1 cup) if your kitchen runs hot. Also, bake on the middle rack of your oven where heat is most even. For extra insurance, flatten each dough ball slightly with your palm before baking. The key is 11-13 minutes at 350°F—pull them when edges are golden but centers still look soft. They'll firm up as they cool.
What's the best way to store these cookies?
For maximum freshness, let cookies cool completely on the baking sheet, then transfer to an airtight container with parchment paper between layers. They'll stay soft for 5-6 days at room temperature or 3 months in the freezer. To revive stale cookies, warm them in the oven at 350°F for 3-5 minutes until edges are crisp again. For serving, I like to sprinkle them with extra flaky sea salt right before eating.
Can I add other mix-ins besides chocolate chips?
Try adding 1/2 cup chopped walnuts or pecans for crunch, or fold in 1/2 cup white chocolate chips for a sweeter twist. For a Ben & Jerry's-inspired variation, stir in 1/4 cup crushed pretzels with the chocolate chips. Just be mindful of portion size—adding too many mix-ins can make the dough too dry. Always keep the total dough volume the same by reducing flour slightly if needed.