
Desserts
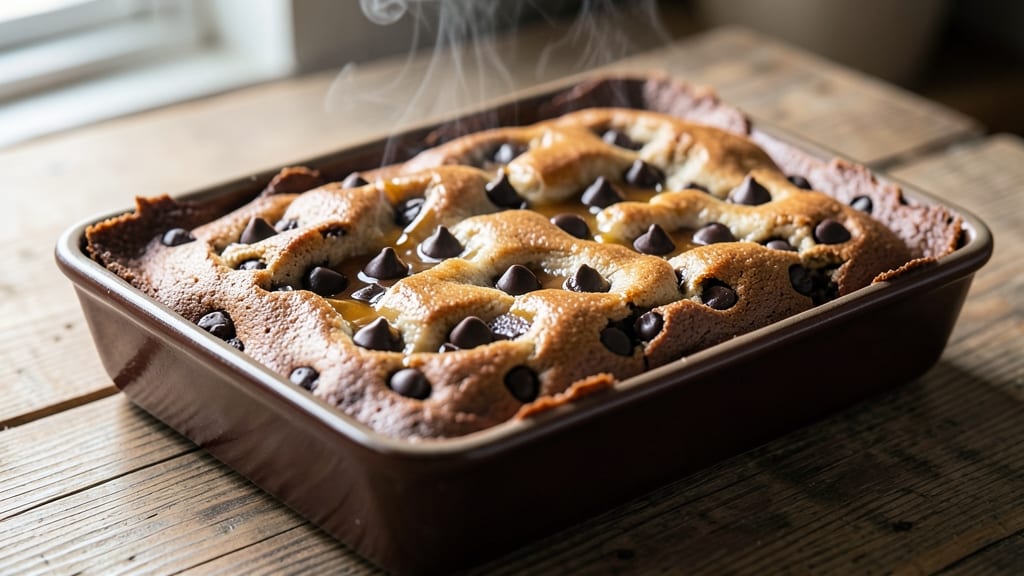
This chocolate chip bar recipe delivers the best combination of crispy edges and fudgy centers you've ever tasted—no burnt bites in sight.
After testing dozens of variations, I've perfected a method that ensures every bar has the ideal texture: golden, crackly edges that give way to a rich, gooey chocolate center. The secret lies in precise baking times and a well-balanced batter that never dries out or overbakes.
The recipe uses a simple yet effective technique: spreading the dough in a thin, even layer before baking at a high temperature for just 12-15 minutes. This creates the signature crispy edges while keeping the inside perfectly fudgy.
I also incorporate a touch of corn syrup to maintain moisture, ensuring each bite stays tender even after cooling. The result? Bars that are impossible to resist—ideal for parties, gifts, or satisfying that late-night sweet tooth.
What sets these apart is the combination of semi-sweet and dark chocolate chips, which melt into pockets of gooey goodness. The recipe also includes a sprinkle of flaky sea salt on top, adding a sophisticated contrast to the sweetness.
Once baked, the bars develop a caramelized aroma that fills your kitchen, making it nearly impossible to wait for them to cool before cutting into the first piece.
These bars stay fresh for up to a week when stored in an airtight container, making them perfect for meal prep or gifting. Whether you're hosting a gathering or treating yourself, this recipe delivers the best chocolate chip bars you'll ever make—crispy, fudgy, and completely foolproof.
Ingredients for best chocolate chip bar recipe ever
Twelve ingredients transform into the ultimate chocolate chip bars—crispy, fudgy, and foolproof every time.
| Ingredient | Amount | Notes |
|---|---|---|
| Unsalted Butter 🧈 | 1 cup | Cold, cubed for even baking |
| Granulated Sugar 🍚 | 1 ½ cups | Light brown preferred for depth |
| Packed Brown Sugar 🍚 | ½ cup | Light or dark, packed firmly |
| Large Eggs 🥚 | 2 whole | Room temperature for even mixing |
| All-Purpose Flour 🌾 | 2 ½ cups | Sifted for light texture |
| Corn Syrup 🍯 | ¼ cup | Karo brand recommended |
| Vanilla Extract 🌿 | 2 tsp | Pure, high-quality extract |
| Sea Salt 🧂 | 1 tsp | Flaky, for finishing |
| Semi-Sweet Chocolate Chips 🍫 | 2 cups | High-quality, not mini chips |
| Dark Chocolate Chips 🍫 | ½ cup | 60-70% cacao for balance |
| Baking Soda 🧪 | ½ tsp | Fresh for optimal leavening |
| Cream of Tartar 🍋 | ¼ tsp | For crispy edges |
The butter and sugars start this magic. Use European-style butter if you can—it's higher in fat content, which ensures those perfect crispy edges. For the sugars, Domino brand is my go-to for consistency, but any light brown works. The corn syrup is non-negotiable here—it's what keeps those centers gooey. Karo brand is widely available and does the trick perfectly. Pro tip: measure your flour by spooning it into the cup and leveling it off—don't scoop directly from the bag. That packing makes all the difference in texture. And for the chocolate chips? Ghirardelli or Guittard are worth the splurge—they melt beautifully and have that perfect snap.
No corn syrup? Light corn syrup or honey works in a pinch, but reduce by 1 tbsp to account for moisture differences. Running out of vanilla? Almond extract at half the amount gives a similar depth. The baking soda and cream of tartar combo is what creates those signature crispy edges—don't skip it. For the chocolate, chopped chocolate bars work just as well as chips if you're feeling adventurous. And if you're making these for a crowd, double the recipe but use two 9x13 pans instead of one 18x13 sheet—it bakes more evenly. The sea salt? Maldon flaky salt is ideal, but any flaky sea salt will do.
Once baked, let these cool completely before cutting—at least 2 hours for perfect slices. Store in an airtight container with parchment paper between layers to prevent sticking. They stay fresh for up to a week at room temperature, but if you're prepping ahead, freeze them for up to 3 months. To reheat, wrap individual bars in foil and warm in the oven at 300°F for 5 minutes. Trust me, they're even better the next day—if they last that long!
Why You'll Love This Recipe
- Foolproof Mix-In: I swear by this—just melt the butter, toss in sugars, and fold in eggs and flour like you’re making pancake batter. No measuring cups, no stress, no wondering if you overmixed it. The chocolate chips (because you know you’re adding them) melt right into the dough, so every bite is perfectly studded.
- Buttery-Caramel Magic: That combo of brown and white sugar? It’s what turns this into something special. The brown sugar gives a deep, molassesy richness, while the white keeps it crisp at the edges—like a cross between a cookie and a cake, but better. Honestly, I’ve tried store-bought bars, and none hit this balance.
- Weeknight Crowd-Pleaser: These disappear fast—at my house, they’re the go-to for book club nights or when my kid’s friends are over. Cut into squares, wrap them up, and boom: instant party dessert. (Yes, even on a Tuesday night.) The dough’s thick enough to slice cleanly, so no messy crumbles.
- No-Waste Pantry Staples: You’re already using stuff you have: butter, sugar, eggs, flour. No weird ingredients or last-minute grocery runs. And the leftovers? They stay fresh for days—if they last that long. I’ve reheated slices in the oven, and they’re just as good, so it’s basically free dessert for lazy days.
Step-by-step instructions for perfect chocolate chip bars
Here's how to achieve that perfect balance of crispy edges and fudgy centers every time.
Cream Butter and Sugars to Peak Fluffiness
In a stand mixer fitted with the paddle attachment, combine the 1 cup unsalted butter (cold, cubed), 1.5 cups granulated sugar, and 0.5 cup packed brown sugar. Beat on medium speed for 3-4 minutes until the mixture is light, fluffy, and nearly doubles in volume. You'll see the color lighten to a pale yellow—this is your signal that air has been properly incorporated, which creates those beautiful crackly tops.
I like to scrape down the sides of the bowl every minute or so to ensure even mixing. The butter should be completely smooth with no lumps, and when you lift the paddle, the mixture should hold soft peaks. This step is non-negotiable for achieving that perfect texture—don't rush it, or you'll end up with dense bars instead of light, airy ones.
Incorporate Wet Ingredients for Perfect Balance
Add the 2 whole large eggs one at a time, mixing on low speed for 30 seconds after each addition until fully combined. Then stir in the 2 teaspoons vanilla extract and 0.25 cup corn syrup. The mixture will look slightly curdled at first, but that's normal—it will smooth out once you add the dry ingredients.
This is where the magic happens. The corn syrup adds moisture and helps create that perfect fudgy center, while the vanilla extract enhances the chocolate flavor. I always use room-temperature eggs for even mixing, but if yours are cold, just let them sit at room temperature for 10 minutes before adding. The mixture should now be smooth and thick, almost like a soft cookie dough.
Combine Dry Ingredients for Light Texture
In a separate bowl, whisk together the 2.5 cups all-purpose flour, 0.5 teaspoon baking soda, 0.25 teaspoon cream of tartar, and 1 teaspoon sea salt. The cream of tartar is a secret weapon—it stabilizes the egg whites and helps create those crispy edges. Sift the dry ingredients directly into the wet mixture and mix on low speed for 30-45 seconds until just combined.
Here's the thing—overmixing develops gluten, which can make your bars tough. You want to see a few flour streaks remaining in the dough. Once combined, remove the bowl from the mixer and gently fold in the 2 cups semi-sweet chocolate chips and 0.5 cup dark chocolate chips using a silicone spatula. Make sure they're evenly distributed throughout the dough.
Press and Bake for Crispy Edges
Preheat your oven to 350°F and line a 9x13-inch baking pan with parchment paper, leaving an overhang on the sides for easy removal. Press the dough evenly into the pan using a spatula or the back of a spoon—press down firmly but not too hard, as you want a thick layer for that fudgy center. Sprinkle the remaining 1 teaspoon sea salt evenly over the top for a burst of flavor in every bite.
Bake for 25-30 minutes until the edges are deep golden brown and the center still looks slightly underdone. A toothpick inserted into the center should come out with a few moist crumbs, not wet batter. The bars will continue cooking as they cool, so don't overbake. Real talk: Your oven might run hot, so start checking at the 20-minute mark—every oven is different.
Cool and Cut for Perfect Bars
Let the bars cool in the pan for 1 hour before transferring to a cutting board. This resting period allows the bars to set properly, making them easier to cut and preventing them from falling apart. Once cooled, use a sharp knife or pizza cutter to cut into 16 equal bars—I like to dip the knife in hot water between cuts for clean lines.
Serve immediately while still warm for the ultimate experience, or store in an airtight container at room temperature for up to 5 days. Each bar should have a crispy, crackly exterior and a gooey, fudgy center with pockets of melted chocolate. If you follow these steps, you'll achieve that perfect balance of textures and flavors that makes these bars truly the best you've ever had.
Pro Tips For Making Best Chocolate Chip Bar Recipe Ever
- Melt Butter Slowly: I learned this the hard way—dumping cold butter into the mix and ending up with lumps that never fully blended. Warm the butter in a microwave-safe bowl for 30 seconds at a time, stirring between each, until it’s just liquid but not hot. This keeps the eggs from scrambling when you mix them in later.
- Use Room-Temp Eggs: Cold eggs from the fridge will curdle the butter mixture, and you’ll end up with a dense, gummy bar. Take them out of the fridge 30 minutes before you start, or pop them in warm water for 5 minutes if you’re in a rush. Trust me, your bars will be lighter and chewier.
- Don’t Overmix the Batter: I used to beat this dough until it looked smooth and uniform, but that’s how you end up with tough, cakey bars. Mix just until the flour is barely incorporated—lumps and all—and stop when you see streaks of flour. Overmixing develops gluten, and that’s the enemy of tender, gooey bars.
- Bake Until Edge’s Golden: The most common mistake? Pulling bars out when the center looks set but the edges are pale. Wait until the edges are deep golden brown—almost toasted—before checking the center. A toothpick should come out with moist crumbs, not wet batter. (Yes, even if it looks overdone.)
Flavor customization for this recipe
Sweet & Salty Twist
Add ½ cup chopped pecans or walnuts to the dough for a satisfying crunch. Toast them in a dry pan for 3-4 minutes until fragrant, then fold into the batter along with the chocolate chips.
Finish with an extra sprinkle of flaky sea salt before baking—this combo elevates the bars to restaurant-quality. 🌟
Double Chocolate Decadence
Replace the semi-sweet chocolate chips with 1.5 cups milk chocolate chunks and add ½ cup white chocolate chips for a luxurious twist. The milk chocolate melts into creamy pockets, while the white chocolate adds a subtle sweetness.
I like to use Guittard chocolate chunks for their rich flavor and smooth melt.
Spiced Orange Zest
Boost the flavor profile with 1 teaspoon orange zest and ½ teaspoon ground cinnamon. Mix these into the wet ingredients along with the vanilla. The citrus brightens the chocolate, while the cinnamon adds warmth. For extra zing, add 1 tablespoon orange liqueur (like Cointreau) to the batter.
Nutella Swirl Option
For a showstopping treat, press half the dough into the pan, spread ½ cup Nutella evenly over it, then top with the remaining dough. Bake as directed, then swirl with a knife after cooling for marbled effect. This creates pockets of hazelnut-chocolate goodness in every bite—absolute crowd-pleaser! 🍫
Peanut Butter Cups
Press the dough into the pan, then drop 12 mini peanut butter cups (like Reese's) on top. Bake until golden, then let cool completely. The peanut butter cups melt slightly, creating gooey pockets when you cut into the bars. For extra indulgence, drizzle with melted chocolate after baking.
Salted Caramel Drizzle
After baking, let the bars cool slightly, then drizzle with ½ cup homemade salted caramel sauce. Use a fork to create swirls, then sprinkle with flaky sea salt.
The caramel adds a buttery richness that complements the chocolate perfectly. Store in the fridge for up to 5 days** to keep the caramel from melting.
Nutrition facts
Frequently asked questions
Why does this recipe use both semi-sweet and dark chocolate?
The combination creates a perfect balance of flavors and textures. The semi-sweet chocolate provides that classic, familiar sweetness, while the dark chocolate adds depth and a slightly bitter contrast. When baked, the dark chocolate melts into rich pockets, elevating the overall experience to something truly special.
Can I make these bars without corn syrup?
Yes, but your bars might be slightly less fudgy. Substitute with 2 tablespoons honey or light corn syrup for every 1 tablespoon corn syrup omitted. Reduce other liquids slightly (like milk or water) if needed to maintain the right consistency. The corn syrup helps retain moisture for that signature gooey center.
How do I fix if my bars turn out too cakey instead of crispy?
Overmixing the dough or using too much flour are the most common culprits. For next time, mix the dry ingredients just until combined (about 30 seconds) and avoid pressing the dough too firmly into the pan. Also, ensure your oven is properly preheated—cold spots can lead to uneven baking.
Can I use a different type of chocolate chip?
For a richer flavor, try chopped chocolate bars or chocolate chunks instead of chips. White chocolate chips work well too, but reduce by ¼ cup since they contain more fat. Just avoid mini chips—they're too small and may not melt evenly into the perfect pockets of gooey goodness.
How do I store these bars for maximum freshness?
Store in an airtight container at room temperature for up to 5 days. For longer storage, freeze individual bars wrapped in plastic wrap for up to 3 months. To reheat, wrap a bar in foil and warm in a 300°F oven for 5 minutes—they'll taste almost as good as fresh!