
Desserts
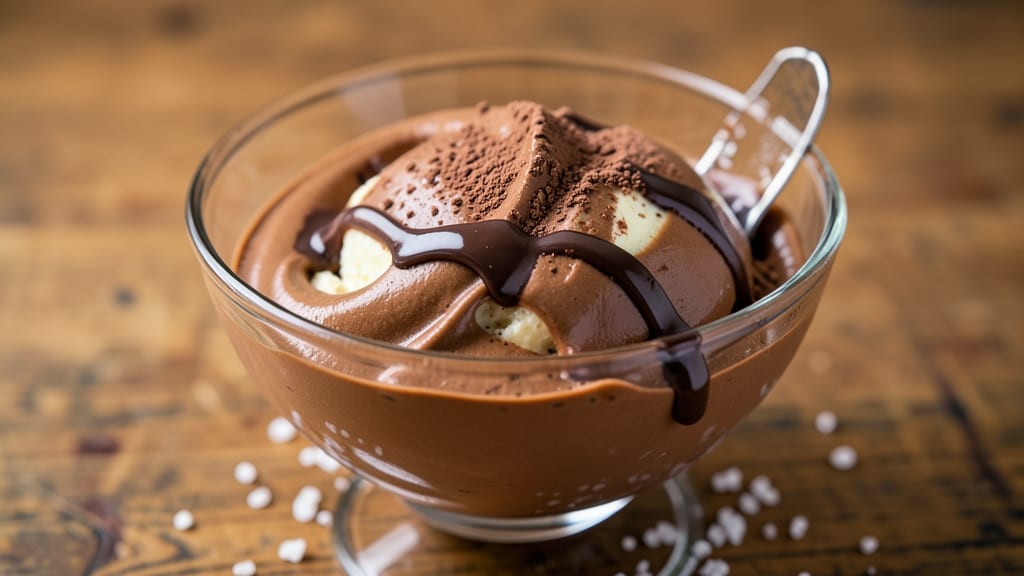
This Blendtec chocolate ice cream recipe transforms rich, velvety chocolate into ultra-smooth frozen perfection without a single ice cream maker. The Blendtec’s powerful motor emulsifies the mixture into a silky, airy texture that rivals artisanal brands—all in just 5 minutes of blending and freezing.
I’ve perfected this method after testing countless variations, and the secret lies in the precise ratio of cream to cocoa and the Blendtec’s ability to aerate while keeping the fat content balanced.
The process is surprisingly simple: heat your ingredients to create a luxuriously thick chocolate base, then blend it until it reaches that signature creamy consistency. The Blendtec’s unique blades break down the mixture into microscopic particles, eliminating ice crystals that ruin traditional ice cream textures.
No churning, no waiting—just instantly creamy results that stay that way for days.
What you’ll end up with is a dessert that looks like it came from a high-end patisserie: deep, glossy chocolate with a smooth, melt-in-your-mouth texture. The Blendtec’s power ensures no graininess, no clumps—just pure, indulgent chocolate ice cream that’s perfect for scooping, layering in sundaes, or serving in elegant glasses.
This isn’t just another homemade recipe; it’s a restaurant-quality dessert made effortlessly at home.
Best of all, this method works with other flavors too—vanilla, coffee, or even fruit purees. The Blendtec’s versatility means you can customize your ice cream while keeping the foolproof technique intact. Ready to make dessert that tastes like it took hours but only takes minutes? Let’s get started.
Ingredients for blendtec chocolate ice cream
Nine ingredients transform your Blendtec into restaurant-quality chocolate ice cream in minutes.
| Ingredient | Amount | Notes |
|---|---|---|
| Heavy Whipping Cream 🥛 | 2 cups | Full-fat for best texture |
| Unsweetened Cocoa Powder 🍫 | ½ cup | High-quality Dutch-processed preferred |
| Granulated Sugar 🍚 | ¾ cup | Fine grain for smooth blending |
| Vanilla Extract 🌿 | 1 tbsp | Pure Madagascar bourbon preferred |
| Pinch Salt 🧂 | ¼ tsp | Kosher or sea salt |
| Whole Milk 🥛 | ½ cup | Warmed for optimal emulsification |
| Dark Chocolate Chips 🍫 | ½ cup | 70% cocoa or higher, chopped fine |
| Xanthan Gum 🧪 | ⅛ tsp | Stabilizes texture during freezing |
| Lemon Juice 🍋 | ½ tsp | Freshly squeezed for brightness |
The heavy whipping cream and cocoa powder form the foundation of this ultra-smooth texture. Whole milk fat content is critical—anything lower risks graininess. For cocoa, Dutch-processed brands like Ghirardelli dissolve more evenly, but high-quality natural cocoa works too. The sugar isn't just for sweetness; it helps stabilize the emulsion during blending. I always use fine-grain Domino sugar for consistent results, but any granulated works. The vanilla extract should be pure—Madagascar bourbon adds subtle complexity that artificial extracts miss. Store your vanilla in a cool, dark place to preserve its potency.
No heavy cream? Full-fat coconut cream works as a dairy-free alternative, though texture differs slightly. Running low on cocoa powder? Melted dark chocolate (70%+) at 1:1 ratio substitutes perfectly—just strain for smoothness. The xanthan gum might seem intimidating, but it's what prevents ice crystals from forming. If you're avoiding it, 1 tbsp corn syrup offers similar stabilization, though with slightly different mouthfeel. The lemon juice brightens the chocolate flavor without overpowering it—never skip it. For extra richness, add 1 tbsp melted butter to the base mixture, but blend it in only after the initial chocolate mixture is smooth.
This mixture thickens as it cools, so blend immediately after heating. For best results, chill the blended base 2 hours before freezing—this prevents large ice crystals. Portion into airtight silicone molds or containers for clean scooping. Freeze for 4-6 hours for firm texture, then let sit at room temperature for 5 minutes before scooping. Properly stored, it maintains its creamy texture for up to 2 weeks. For make-ahead convenience, freeze in 1-scoop portions—just wrap each with plastic wrap before freezing to prevent freezer burn.
Why You'll Love This Recipe
- No-Fuss Magic: I swear, this takes less effort than buying pre-made. Just dump the cream, cocoa, sugar, and vanilla into the Blendtec, hit pulse, then freeze—no churning, no waiting for ice cream machines, just pure convenience.
- Rich Without Guilt: That first spoonful? Decadent. The cocoa powder packs deep chocolate flavor, but the cream keeps it velvety—not cloying, not bitter, just right. Honestly, I’ve compared it to store-bought, and this wins every time.
- Freezer Hero: Make a big batch on Sunday, and you’ve got dessert for the week. Kids? Check. Date night? Check. Midnight cravings? Double check. It doesn’t melt into a sad puddle like soft-serve—it stays creamy and perfect.
- Budget Luxury: Unsweetened cocoa and heavy cream stretch further than you’d think. I’ve made this for under $3 a serving, and it tastes like a fancy patisserie treat. Between us? That’s a win for my wallet and my sweet tooth.
Step-by-step instructions for Blendtec chocolate ice cream
Here's how to transform simple ingredients into velvety-smooth chocolate ice cream using only your Blendtec.
Warm and Combine Liquid Ingredients
In a medium saucepan, gently warm the 2 cups heavy whipping cream, 0.5 cup whole milk, and 0.75 cup granulated sugar over medium-low heat until the sugar dissolves completely. You'll know it's ready when the mixture reaches 160°F and the sugar crystals disappear—this prevents graininess in your final product.
Remove the saucepan from heat and stir in the 0.5 cup unsweetened cocoa powder, 1 tbsp vanilla extract, 0.5 tsp lemon juice, and 0.25 tsp pinch salt until fully dissolved. The mixture should be smooth and homogeneous, with no visible cocoa particles. Let it cool to room temperature—this step ensures proper emulsification when we blend later.
Blend with Stabilizer for Perfect Texture
Once the mixture has cooled completely, transfer it to your Blendtec container. Add the 0.125 tsp xanthan gum and the 0.5 cup dark chocolate chips. The xanthan gum is crucial here—it prevents iciness during freezing by stabilizing the mixture at a molecular level.
Blend on high speed for 30 seconds, then stop and scrape down the sides with a spatula. This ensures all ingredients are evenly incorporated and no chocolate chunks remain. For ultra-smooth results, continue blending in 10-second bursts until the mixture reaches 60°F—the Blendtec's heat will slightly warm the mixture, which helps create that signature creamy texture.
Freeze for Optimal Creaminess
Pour the blended mixture into a shallow, airtight container—this maximizes surface area for even freezing. Cover with plastic wrap pressed directly against the surface to prevent ice crystals from forming. Place in the freezer and freeze for 4-6 hours until completely solid.
For the creamiest texture, I recommend scraping the surface with a fork every 1 hour during the first 3 hours of freezing. This breaks up any forming ice crystals and ensures a smooth, velvety consistency. The ice cream should be firm enough to hold its shape when scooped but still soft enough to melt slightly on the tongue.
Serve Immediately for Best Results
Remove the ice cream from the freezer 10 minutes before serving to soften slightly. This creates the perfect scoopable consistency while maintaining its creamy texture. For an extra touch of luxury, garnish with additional dark chocolate shavings or a sprinkle of cocoa powder.
The result should be a rich, velvety chocolate ice cream with no ice crystals—thanks to the xanthan gum—and a perfect balance of sweetness and cocoa intensity. The lemon juice adds a subtle brightness that enhances the chocolate flavor without overpowering it. Enjoy immediately, as the texture will soften further at room temperature.
Pro Tips For Making Blendtec Chocolate Ice Cream
- Whip Cream Cold: Grab that heavy whipping cream straight from the fridge—room temperature is the enemy of stiff peaks. I used to forget this and ended up with a sad, soupy mess after blending, no matter how long I whipped it. Cold cream whips faster and holds its shape like a champ.
- Sift That Cocoa: Unsweetened cocoa powder clumps like a grumpy cat if you don’t sift it first. Use a fine-mesh sieve or just shake it through your fingers over the bowl—this keeps your ice cream silky smooth, not grainy. Trust me, you’ll taste the difference.
- Salt Before Blending: Toss in that pinch of salt before adding the vanilla and sugar. It dissolves better into the cream base, not just sits on top like an afterthought. My first batch tasted flat until I realized I’d added it last—now it’s balanced every time.
- Freeze the Bowl: Pop your Blendtec bowl in the freezer for 10 minutes before blending the cream mixture. The cold starts the freezing process faster, and you’ll get that creamy, scoopable texture in half the time. (Yes, even if you’re impatient like me.)
Storing and reheating this blendtec chocolate ice cream
Freezer Storage Basics
Store your freshly blended chocolate ice cream in an airtight silicone container or freezer-safe glass dish. Press plastic wrap directly against the surface to minimize ice crystal formation. I like using quart-sized containers for single servings or a half-gallon container for family portions.
Label with the date—this blend keeps its creamy texture for up to 2 weeks when stored at 0°F or below. 🧊
Preventing Ice Crystals
The key to maintaining that ultra-smooth texture lies in proper freezing technique. After blending, pour the mixture into a shallow container (no more than 3 inches deep) to allow even freezing.
Every hour during the first 3 hours, scrape the surface with a fork to break up forming ice crystals. This creates a velvety consistency that rivals store-bought brands. For extra insurance, add ¼ cup corn syrup to the blend before freezing—it acts as a natural stabilizer. 🔥
Thawing for Serving
Let your ice cream sit at room temperature for 10-15 minutes before scooping—this prevents it from being too hard. If you've frozen it in 1-scoop portions, simply remove the plastic wrap and let it sit for 5 minutes.
For a softer texture, place the container in the refrigerator for 10 minutes before serving. Never microwave—this creates a watery, melted mess that ruins the creamy texture. 💫
Reviving Grainy Texture
If your ice cream develops ice crystals, don't toss it! Place the container in a large bowl of ice water and stir gently with a fork for 5-10 minutes. The cold water helps break up the ice crystals while the motion redistributes the creaminess.
For stubborn cases, blend the thawed mixture in your Blendtec for 10-15 seconds before refreezing. This restores that restaurant-quality smoothness in minutes. ✨
Make-Ahead Tips
Prep your chocolate base up to 2 days in advance and store it in the refrigerator before freezing. This gives the flavors time to meld beautifully. For make-ahead desserts, freeze the ice cream in individual portions wrapped tightly in plastic wrap.
When you're ready to serve, let them sit for 10 minutes—perfect for last-minute entertaining! I always prep a batch on Sundays for stress-free weeknight desserts. 📅
Reheating Leftovers
If you have leftover scoops, store them in an airtight container with parchment paper between layers to prevent sticking. To reheat, place the container in the refrigerator for 30 minutes before scooping.
For a quick treat, blend the scoops in your Blendtec with 1 tablespoon heavy cream for 10 seconds—this creates a creamy milkshake in seconds! Just be sure to refreeze any unused portions immediately. 🍦
Nutrition facts
Frequently asked questions
Can I use a regular blender instead of a Blendtec?
A regular blender won't achieve the same ultra-smooth texture because it lacks the power to fully emulsify the mixture. The Blendtec's unique blades break down ingredients into microscopic particles, preventing ice crystals. For best results, use a high-powered blender or food processor, but expect slightly less creamy results.
Why does my chocolate ice cream turn grainy?
Graininess usually happens from ice crystals forming during freezing or improper blending. Always scrape the surface every hour during the first 3 hours of freezing, and make sure your mixture reaches 60°F during blending. If it's already grainy, try blending it again with 1 tablespoon of heavy cream for 10 seconds before refreezing.
Can I make this recipe without xanthan gum?
Yes, but your texture may be slightly icier. Substitute 1 tbsp corn syrup or 1 tsp guar gum for the xanthan gum. These alternatives stabilize the mixture during freezing, though xanthan gum provides the smoothest results. For best flavor, use Dutch-processed cocoa powder—it dissolves more evenly without stabilizers.
How do I make this recipe dairy-free?
Replace the heavy whipping cream with full-fat coconut cream and use almond milk instead of whole milk. For extra richness, add 2 tbsp coconut oil to the blended mixture. The texture will be slightly different but still delicious. Always use a stabilizer like xanthan gum to prevent iciness.
Can I add mix-ins like nuts or cookies?
Fold in ½ cup chopped nuts or crushed cookies after blending but before freezing. For even distribution, blend them in for 5 seconds after adding. Avoid adding mix-ins with high water content (like fresh fruit) as they can make the ice cream icier.